On the heels of the highly anticipated Victoria’s Secret Fashion Show in London last week, I have decided to do a quick tutorial on how to get the coveted hair and makeup straight from the runway. Head makeup artist Dick Page created a classic Bombshell look with a light smokey eye, and hair master Akki Shirakawa created the beautiful lived-in waves every girl wishes for. Here is my interpretation of the look and how you can master it too!
Makeup!
I started with a layer of MAC Studio Fix Foundation (NC44) along with some MAC Prolongwear concealer in (NW25) under my eyes, and around my nose. On my eyebrows I used MAC Eyebrow Pencil in Spiked.
Taupe shadow all over lid
dark brown shadow smudged into lashline
Continue shadow underneath 3/4 in
Smudge black eyeliner into outer corners
Optional Lashes/Mascara
Apply light shimmer to inner corners
Pink blush then buffed out with bronzer
For lips I used MAC Spice to line the lips as well as color in the corners. I added OCC Lip tar in Trollop and blended it in with the liner, then topped it off with some CHANEL Rouge Allure Gloss in Sensuel for pinky nude pout.
and now for the hair! For a more in depth hair tutorial click here!
Start with hair that has been rough dryed with mousse. Clip up the crown, then split the bottom section in half. Prep the hair with a light spray.
Using a 1 inch curling iron or want, wrap chunks of hair around the iron in random directions.
Continue for the entire head, and flip the hair and finger through the curls.
With all of the choices in beauty products, every girl can appreciate a good bargain. I have curated a list of my current favorite inexpensive beauty products that I can’t live without!
This mascara is my go to for all of my on set makeup applications, it adds fullness in length with only two coats, and doesn’t flake. Compared to other drugstore brands this one lasts me quite a while, without drying out. Works for me!
These blushes were brought to my attention by a fellow HMUA on set! I was delighted to see how beautiful they photographed! The colors all have a sheen and a medium color payoff, but is build-able. They give a very etherial flush to the skin, and the lighter colors are great as a highlighter. My favorites are Pink Fetish and Wanderlust.
This product was also recommended to me by a fellow HMUA Alberto Luengo (He’s awesome check him out). NanoBlur is a instant pore/wrinkle filler and makes the skin look ah-mazing. It also leaves the skin feeling very silky and matte. It works best on combination to oily skin, but prepping with a good moisturizer before will help dryer types.
This is my go to gel eyeliner when I run out of my MAC Fluidline… (infact I may like it better! shhhh). This liner is blackest of the black and applies very opaque. No drying out and even comes with its own brush! A must have for all of you Cat Eye lovers.
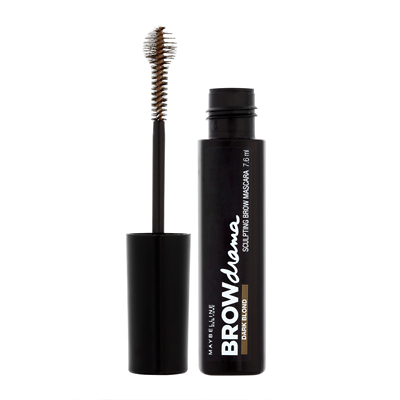
I picked this product up on a whim and was pleasantly surprised! This is a the perfect product if you have a short time to get ready in the morning and want to polish up your brows while adding a little shape and color. This does not replace a brow pencil or powder as the application of the brow mascara is not as precise, but a great product for the money!
Being a Florida girl I am naturally obsessed with all things beach, and of course mermaids. They always have the best sea salt infused, undone beach waves with just the right amount of messiness. Here is what I have found to be the easiest way to get perfect mermaid hair!
Step 1: Prep clean hair with a beach spray/salt spray to give the hair some “grit”. This will mimic the natural texture that you achieve after a day in the ocean, and will help super silky strands actually hold. I love to use NYM Sea Salt Spray. After you have applied the product evenly, (don’t soak the hair, just enough to make it damp) rough blow dry your strands until bone dry.
Step 2: Section the hair. I love to do a middle part when I do mermaid waves, adding the the bohemian-like feel. I clip up the entire crown section of my hair, then split that into two even sections.
Step 3: Using a 1 inch wand curling iron, I take chunks of hair and twist/wrap them around leaving the ends out. If you don’t have a wand just use a regular curling iron, and don’t use the clip. Release the curl and pull the end of the curl to stretch it out. This will loosen the curl and give you a perfect “un-done” wave. I like to do alternating directions as well (some away from the face, some curling towards the face) This technique will give you a more piece-y look.
Step 4: Flip the hair and run your fingers through from the roots to the ends to separate the curls.
Step 5: Use a finishing texturizing spray, my favorite is Oribe Après Beach Wave and Shine Spray, to give the waves texture and shine.
*PS! This stuff smells amazing! So much so that Oribe made a perfume because so many people liked it!
I finally received my Anastasia Contour Kit, and I can’t tell you how much I love this product. Upon first opening the palette, I noticed what a great variety of colors it included: Vanilla: a matte shade with a pink undertone, Banana: a matte shade with a yellow undertone, Sand: a neutral shimmer highlight, Java: A warm brown matte shade, Fawn: a taupe matte shade and finally Havana: a red based matte brown
As a makeup artist our kits are always changing. We are always reading about the latest “Holy Grail” makeup product, or coveted must haves. That being said, I must say I was hesitant to buy this product after much press, because I typically like to contour and highlight with creams opposed to powders. My opinion was definitely changed when I finally got to test out the Anastasia Contour Book.
The reason why i shy away from highlighting and contouring with powders is due to the face that if you use the wrong type, it can make the skin look dry, and can show a lot of texture. I was pleasantly surprised when I used these powders, that they were highly pigmented and went on silky smooth, yet was easy to blend. This palette is perfect for my kit as it works with many skin tones, yet it would be perfect for the makeup beginner who wanted to practice with highlighting and contouring.
Here are some stages of my process:
No Foundation
Foundation Only
With Full Contouring
I ended up using this product all over my face, including my eyes!
I used a mix of Java and Havana under my jawline, and in the hollows of my cheek as well as in my crease.
I used fawn along the sides of my nose and inner eye sockets to make it appear thinner
Banana was used under my eyes (with no concealer underneath!) , down the center of my nose, and on the chin.
Sand was used to highlight my brow bone, on my eyelids, above the brows, high points of the cheek, and my cupids bow.
I can’t wait to play with these products on my clients faces! Do you contour your face on a daily basis?
I would like to introduce you all to Kevyn Aucoin’s Sensual Skin Enhancer, the most amazing concealer/highlighter I have ever used. For all of you makeup obsessed out there, you already know that Kevyn is a makeup legend, and was basically the first Celebrity Makeup Artist. He was the favorite of the likes of Madonna, Cher, Naomi Campbell, Kate Moss…to name a few, before his untimely death in 2002. As an aspiring makeup artist in middle school and high school his makeup books “Making Faces” and “Face Forward” were my bible. Before his death, he created his own beauty line, and Sensual Skin Enhancer has been a cult fave, and in every pro artists kit. Not only does it cover everything, it doesn’t budge, and you get so much out of one container. This can be used as a concealer, highlighter, contour, or thinned out with a moisturizer and be used as a foundation. The price is not cheap at $45, but iI’m telling you it’s worth it.
Want a little trick of the trade for concealer?
When applying concealer use a fluffy brush to apply such as MAC’s 224 or 286, this will help distribute the product more evenly. You can also spray your brush with a little Fix+ to thin out the concealer if needed.
Pick out a color that is SLIGHTLY lighter than your skin tone, and in a peachy/salmony undertone. This will brighten under the eye.
When applying the concealer/highlighter, place it in a triangle shape underneath the eye from the inside corner of your eye to the base of your nose, then connecting to the outside corner of your eye.
Like this:
Because of the natural face shape, that part of the face naturally is concave, then dark circles, and puffiness add to the tired look. Placing the concealer like so will brighten that area up and it will almost look like a filler. It wakes up tired eyes and is like a mini face lift!
Although I have few Chanel products in my kit, I had to try the much buzzed about Soleil Tan De Chanel. After several trips to the Chanel counter I finally got my hands on the constantly sold out cream bronzer.
First of all I am a sucker for packaging and I must say Chanel does it well. The container is huge and not very kit friendly size wise. However I do appreciate that although the price is steep at $48 you get 30 grams of product.
Being a pretty tan person, (my color at MAC is NC42ish) I was disappointed that the bronzer did nothing for me. wah. I did observe that the texture was super smooth and velvety and had a nice smell to it.
So not for me, but I did use it for the first time today on some clients, and i LOVE it! I used it on fair to medium skin tones and the results were beautiful. Nice natural golden bronze look, not streaky, and did not get patchy. I applied it with a Crown duo fiber Stippling brush layered over airbrush. Here’s one of the clients i used it on!
So final thoughts: Great cream bronzer, not so good for darker skin tones. Beautiful packaging and also a great deal for the amount of product. I hope they make another color for us Tan girls!
Your brows set the stage for the rest of your look, but sometimes you’re just not sure how to get that classic arch. It’s easier than you think – makeup artist Eri Vincent reveals the golden rule for perfectly-shaped brows!
Subscribe for more great videos!
Follow us on FB: /FemRougeMagazine
Tweet us at: @femrougemag
and don’t forget to visit www.femrouge.com for the e-magazine!


")


 No Foundation


